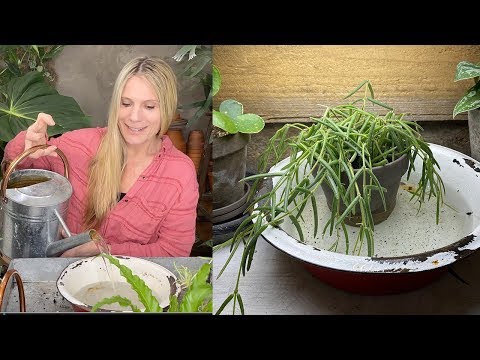
Watering potted plants is probably the most common chore you do, and you probably do so by pouring water on top of the soil. While this can be a worthwhile method of getting moisture to your plants, it isn’t optimal for many species. If you put water on a plant’s leaves, like African violets , it dries them out and makes their leaves discolored and spotty.
Plants that become root bound may not have the ability to absorb moisture into the soil, resulting in water running down the sides of the planter instead. Adding moisture to the soil more efficiently by watering from the bottom of potted plants eliminates these problems. With a little knowledge, you can water your plants from the bottom instead of from the top, and that’ll save you both time and effort as well as give them a healthier environment.
What is Bottom Watering?
Watering from the bottom is a practice in which you place your potted plant in a small container in which there is a small amount of water. Water can absorb into the soil through the drainage holes in the planter’s drainage system over a period of time without becoming oversaturated.
Potted plants’ roots become stronger when the water is applied from the bottom up, because they have become used to growing toward moisture. Moreover, you’ll know for sure the moisture in the potting soil reaches your plants’ roots to the very bottom. The method is suitable for every potted plant, whether it is indoors or outdoors, when applied correctly.
What’s most important to keep in mind when choosing bottom watering is that one drainage hole MUST be present in the pot! You will have a hard time getting water into the pot if it doesn’t have a drainage hole.
How to Bottom Water Your Plants
Step 1
Add enough water to your sink or container to reach the bottom of the soil in your planter.
In a planter constructed of just soil, all water levels are perfect. If the drainage rocks at the bottom of the planter extends to the bottom of the planter, the water should rise so that the water reaches the soil. It is important to know that all types of soil will absorb the water in a different way. Cactus soil that is mainly rock and pearlite in composition will not be able to accept water as effectively as something that is mainly sphagnum moss and bark. It’s like the difference between absorbing liquid from a towel or from a regular piece of paper. Makes sense?
It is important to have enough water available in your sink or in the container for the plant so it can soak in all it needs. In the event that you don’t correctly fill the container with water you’ll result in under-watering the plant.
Step 2
Your plants might start floating if the soil in the container is very dry and you’re still using the grow pot from when you bought them. Please make sure the plant is sitting straight in the water before leaving it alone. I believe I may have watered a very dry plant that was still in its grow pot in my sink but it floated and turned over and I didn’t know it. That was a mess to clean up. Just be aware of that.
Step 3
Make sure that the plants have been sitting in their bath for about ten minutes before you check on them. You will notice that they are ready to come out when the soil has been completely wetted all the way to the top.
Inspect the moisture level again in the container to ensure that enough water was absorbed by the potting soil. The planter’s surface can still be dry, so make sure it soaks up as much water as possible by leaving it in the water for up to 20 minutes longer. Remove any excess water.
It’s okay if the soil at the very bottom of the pot does not get wet. I just top it off with a thin layer of water and pull it out.
Step 4
Until the water drains from your sink, let your plants hang out in that area for a few minutes. That’s it!
By watering at the base of one’s potted plant, water is evenly applied, which keeps the roots from becoming overly dry, but it does not wash away the salt and minerals that build up on top. Every month, irrigate the soil by pouring water until the water drains out of the bottom so it can be rinsed well and free of minerals.
What size plants can I bottom water?
This technique works best on somewhat smaller plants that can be moved easily. That said, if your plants are too big to move or are too tall after they’re in your sink, then it’s probably not the best technique.
Pool Occupancy
The stems and leaves of your plants can be damaged if they are placed too close. Additionally, the amount if water you have in the sink can also say something about how much water they will require.
Take extra care with plants with fragile stalks and leaves. Try not to bend your plant’s leaves too far. If you do, they might break.
Add your Vitamins
Bottom watering is the perfect way to feed your plants! Just add the food to the water and watch out for stains on your sink!
Watch the time
Overwatering occurs when plants are watered too often or sit under water for too long. If you water too frequently, they will remain under the water too long, which can damage them. It doesn’t matter how big or small the planter is and what type of soil it was planted in, you’ll be able to figure out the perfect time!

